Tag filters
Tag filters is a method for dynamic scheduling or "smart playlists". It's a powerful function and great care should be taken when preparing to get the most benefit from using it. Tag filters operate globally within the site and do not consider screen access rights. For this reason, it's not suitable for a normal Publisher who should have access to a limited set of screens. It is intended for the information manager or possibly marketing department that perform booking centrally to all or most screens.
Basic principles
- A tag filter is used to target a set of screens
- Tag filters only target the primary layer of the screen
- It consists of one or several conditions which are matched against
the screen's tags
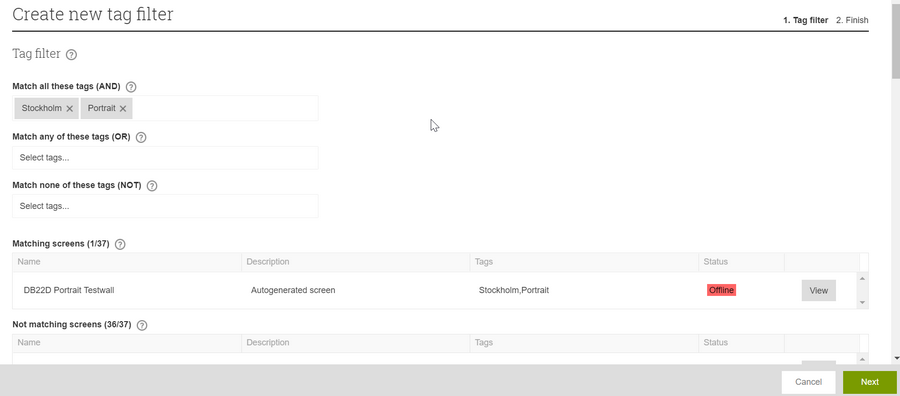
- Match all these tags (AND)The condition will only be met if the screen has all these tags
- Match any of these tags (OR)The condition will be met if the screen as at least one of these tags
- Match none of these tags (NOT)The condition will not be met if any of these tags are matched
- For a screen to be included in the filter, it must meet all the used conditions
- Once you have defined a tag filter, bookings can be created for it, in the same manner as for a normal screen or channel
Creating a tag filter
Before creating a tag filter, you should make sure that all the tags you wish to use are available in the site. You can only use tags that have been predefined. If you have the relevant access rights, tag management can be found in the Management menu. In addition, it's recommended to tag your screens before creating the tag filter. That way you get a clearer picture of which screens will be targeted or not when creating the filter.
- Open Management and select Tag filters
- Click Create new in the action bar
- Input tags in the different fields to select which screens should be
targeted by the tag filter. Below that different criteria you will
see a list of all screens that match the current criteria as well as
a list of the screens that do not. Once you are satisfied with your
criteria, click Next.
- Input a name for the tag filter
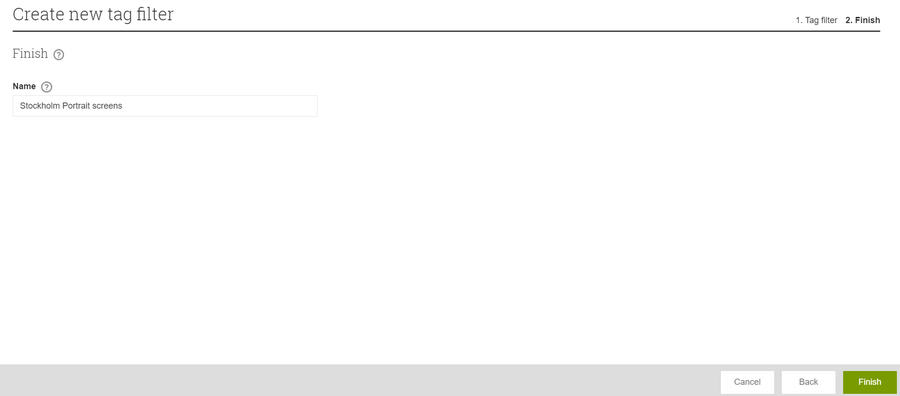
- Click Finish in the action bar
- Done

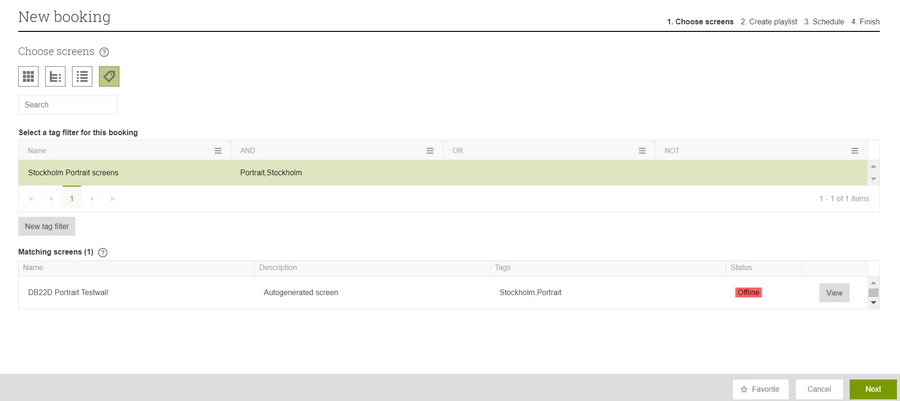
Creating a booking, using a tag filter to select screens
You have defined tags, tagged your screens and made one or more tag filters. Now you are ready to publish content to the screens targeted by those tag filters.
-
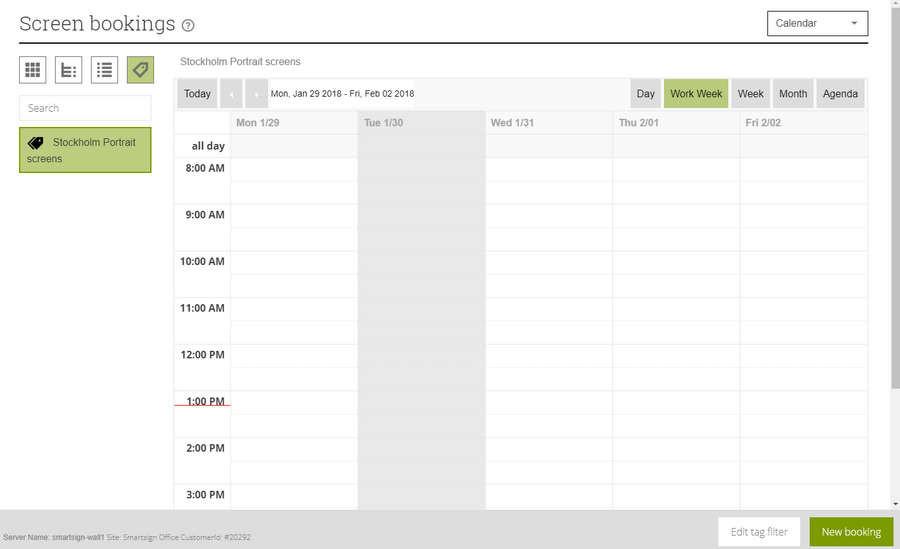
Open the Publish menu and select Screens
-
On the left-hand side, select the tag icon above the screens

-
You will now see the tag filters which you have created below it
-
Click New booking in the action bar
-
Select the tag filter that targets the screens you wish to publish content to and click Next to continue
-
Add media to the playlist and adjust order and media settings as desired, then click Next to continue
-
Input the time, date, recurrence etc for when this booking should display on screen
-
Input a name that helps you identify the booking and an optional description. Adjust the other settings to your liking.
-
Click Finish
-
Done
Editing a tag filter booking
-
Open the Publish menu and select Screens
-
On the left-hand side, select the tag icon above the screens
-
You will now see the tag filters listed below it
-
Select a tag filter
-
All bookings made, using that tag filter, will now show in the calendar or list to the right
-
Select the booking that you wish to edit
-
Click Edit in the action bar
-
Adjust the booking as desired and click Save to finish
-
Done
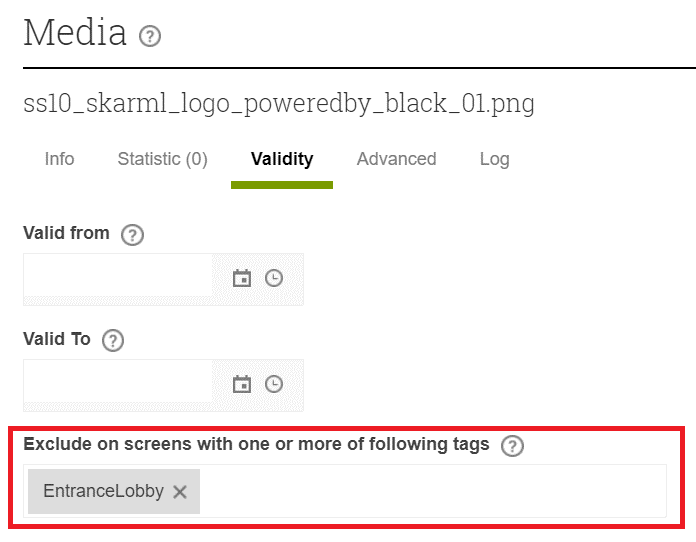
Media exclusion tag filter
Sometimes there's a need to exclude a specific media from certain screens. The media exclusion tag filter provides a very efficient method to do so. Since the filter is connected to the media item itself you don't need to worry about booking on the wrong screens or similar. If it has been excluded it will not be distributed to the screen even if you book it by mistake.